Roasted Lamb Leg
: food, March 07 2021 ▶
 Yep, roasted lamb leg. On the butcher's schematic - it is the thing in the back of the poor (but delicious) animal. The front one is called "shoulder" and the "shanks" are the bottom parts of the front and back legs. Do not let anyone bullshit you - this recipe is neither quick, nor a cheap one. You need minimum 4 hours (roasting) plus the overall preparation. A good piece of lamb is a costly one. What you see here was ~3kg. Anyway - let's get down to business.
The "before" pic:

The making:
- I always rinse and pat dry any meat,...just in case.
- There is a thin membrane covering the meat. Some people remove it, but I leave it as a protective cover. Trim all other non-meaty parts.
- Using a sharp, thin knife - make holes at 5-7cm uniform distance from each other.
- The rub - 2ts salt, 2ts paprika, 1ts cayenne pepper, 1/2 ts black pepper, 8ts sunflower oil.
- Rub it!
- Put 1/2 garlic clove (or even the whole clove if it is too small) and some rosemary in each hole you made. Do not let the garlic to stick out of the meat or it will fall off during the roasting. I would have used fresh rosemary if I could find one...
- Use a tray with a rack, that can fit the leg. If you do not have such, you can put some fresh onion (scallion) or leek, so it lifts the meat ~1cm.
- Put some water (or beer...yeaah shame) in the tray, so it barely touches the meat.
- Cover the whole thing with aluminum foil and close any holes.
- Roasting time (with fan):
1/2 hour at 200C
3 hours at 160C
uncover the meat (remove the foil)
1/2 hour at 160C
- Remove from the oven and let it rest for 5 minutes.
- Under NO circumstances serve this cold!!
- It goes pretty well with mashed potatoes, dry rose` or wheat beer.
Potatoes Lilly
: food, February 05 2021 ▶
 You may wonder "why writing about something as bland as potatoes"? Let me stop you there with a brief example: yesterday I made pork chops with peaches, garlic, rosemary and bourbon - a recipe from Jamie Oliver. Then, on the side, I decided to make some french fries using the "Lilly" potatoes (did not know the sort before that) and some duck fat. 10 minutes into the meal, being the heavy-meat-eater, I was thinking to myself "well, I do not need the pork chops...".
This article is more as a reminder to myself, what should I look for. The story goes back a couple of months ago, when I bought accidentally a bag of "Lilly"-potatoes. Prepared them all ways imaginable and the result was always perfect. These potatoes are, by far and with enormous lead, THE BEST POTATOES I have ever had. Of course, I threw the bag before getting the sort, then desperately binge-buying random bags of potatoes in different stores...but alas, none of the got even close. And that was till yesterday! Thank you, Lord!
Found an online shop selling them, could not find the botanical name, but will continue searching. Again: roast or deep fry some in high-smoking point fat (they will get a bit mashy when you stir, which is perfect, as the thin end will get so crispy), put some salt, grab a wheat beer and enjoy life.
Roasted Duck
: food, January 30 2021 ▶
 Not my own recipe, but more like a recommendation - it works really good.
What you need:
- Duck
- 2 lemons - if you are not sure of their skin's quality just remove it!
- 1 garlic head
- 1ts honey
- 2ts (balsamic) vinegar
- salt
What you need to do:
- Score the duck's skin (sharp knife needed), try not to touch the meat underneath.
- Cut one lemon in 4 parts, break the garlic head (you do not need to peel it) and mix together. Put both inside the duck.
- Tie the legs with butcher's twine or make one from aluminum foil.
- For the glaze: mix the lemon juice from 1 lemon, 1ts. of honey and 2ts vinegar. DO NOT use it now!
- Salt the duck generously and put it in a tray with rack (pic above), breasts upwards. If you do not have such you can improvise by putting a smaller tray or a heatproof bowl, upside down inside the bigger one, so it raises the bird at least 1cm above the tray's bottom.
- Put 300ml water on the bottom of the tray.
- Roast the duck 1 hour on 180C with fan (else 190C).
- Pull it out of the oven, pour out the fat and save it for roasted potatoes.
- Rotate the duck so the breast point downwards, roast another 40 mins.
- Pull it out, apply some glaze on the back and rotate it again - breasts up. Apply glaze and return it in the oven for 10 mins.
- Apply glaze again, roast another 10 mins.
- One more time.
- Done.
As mentioned - I served it with roasted potatoes, which I made in the same already heated oven. Using some salt, 1/2 beer and 6ts from the bird's fat. Put some Grenache (or any kind of Merlot) on the side and you have one perfect (and stylish) dinner.
Selyodka pod shuboy
: food, January 09 2021 ▶
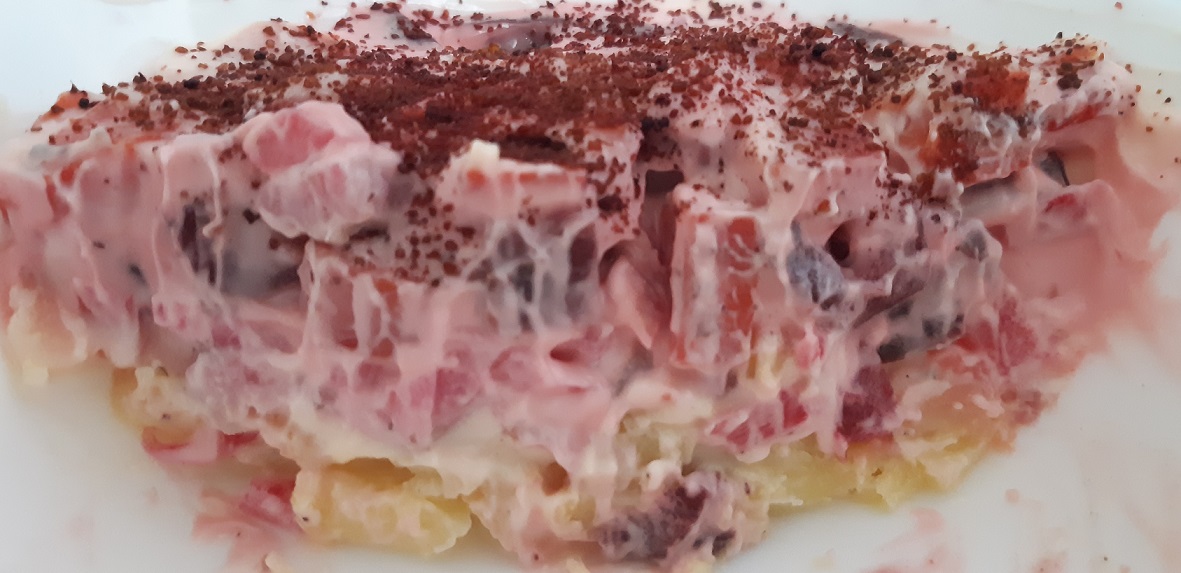 There is no way I can take a good picture of the final product, no matter what I do. It will come either as bland top-view pic or messy side-view. Well, as you see, I preferred the latter. Depending where you live, this "salad" is called "dressed herring" or "herring under a fur coat", which is a direct translation from the russian "selyodka pod shuboi". It is a simple, but very time consuming dish. Benefit: you can store it in the fridge for about a week.
Ingredients:
- Herring fillets - no skin, no bones, salted only. Avoid the more common sour ones.
- Mayonnaise - pretty please, use the regular one and not the canola-oil-garbage.
- Boiled potatoes - with some salt, just as they become soft, not ready for mashed potatoes
- Onions
- Boiled red beet
- Boiled carrots
- Salt - just a pinch for the red beet and carrots
- Ground black pepper [not in the original recipe]
- Sumak for garnish on top [dill in the original recipe]
- Boiled and grated eggs [I do not use them]
I cannot give exact quantities as this depends on the amount of salad you want to make. I use 4 small soup cups, as this is best for serving and storing. One cup is enough for a single person. The arrangement is in ~1cm thick layers. You have to put some mayonnaise on top of each layer and then continue with the next.... yeeah, we will be using a lot of mayonnaise. Here is the order of the layers:
- potatoes and ground black pepper(+mayo)
- herring (+mayo)
- onions - this layer is 1/2 thick (+mayo)
- red beet (+mayo)
- carrots (+mayo)
- eggs and garnish
I put as little mayonnaise as possible, but enough to create a "flat" surface on the top of the layer.
There is one drink, and one drink only that goes with the salad - fine russian vodka.
Dried meat
: food, December 09 2020 ▶
 Once in a while I like to have some intense flavor next to the fine glass of wine. Salami works just fine, but I go a step further by making some home-dried meat.
The meat:
Beef, pork, game meat will do (anything but poultry, although some people claim good results). The main goal is to be less-fatty, no membranes, veins, threads, etc. Just a clean slab of meat. Ideal proportions - 30cm, 10cm, 5cm, ~1kg. I used faux-fillet (sirloin) beef. Of course nowhere near the ideal proportions, but hey, there will be a "next time" for sure.
The tricky part - curing:
There are many ways to do it. I have tried them all and the "controlled dry curing" works best for me. All relative to 1kg of meat:
- 15gr regular salt
- 15gr curing salt
- 2gr sugar
- spices of your choice - ground fenugreek (cemen), ground black pepper, cumin - these are just for the curing process, so do not overdo it here.
- some working with your hands - rub the sugar, then the salt, then the spices into the meat.
- if you cannot vacuum-seal the meat, put the meat in a plastic bag, put it into a bowl of water, then tie it. This will ensure as little air inside as possible.
- put the bag in a cool place for 7 days (10 is also fine).
- turn it upside-down each day and massage it a bit.
Drying:
- put the meat out of the bag, rinse and pat-dry with kitchen paper. Moisture is unwanted.
- press it down with some weight overnight.
- put a hanging thread through the meat.
- mix your favorite spices, enough to fully cover it. I use again 1ts (tea spoon) ground fenugreek, 1/4ts cumin, 1ts sweet paprika and 1/2ts cayenne pepper, 1ts dried summer or winter savory. Rub the stuff all over the meat.
- leave it hanging in a cool, dry, airy place for 10 days.

...well I have to admit I cheated a bit on the last step, but the result was exactly the same. So I do not a have dry, airy place. Mostly because of the local climate. But I have an oven with a fan, that can be tuned down to 35C. 8 hours inside, with the lid slightly open to let the moisture out, did the task just fine. After that the meat was not 100% as I would like it to be, but I put it in kitchen paper and then in the fridge, so after 2 days it was "perfetto"!